오늘은 InputSystem에 대해 더 자세히 알아보는 시간을 가지고자 합니다.
지난번에 InputSystem에 대해 글을 작성하고 난 후,
추가로 알게 된 정보들이 몇 가지 더 있어서 정리하고자 합니다.
보충 버전이라고 할까요?
기존 블로그에 작성한 것에 추가하기에는 내용이 많아서
따로 글을 작성하게 되었습니다.
이전에 쓴 글 내용은 아래 링크를 참고하시면 될 것 같습니다.
2024.10.15 - [유니티/공통] - 유니티 - InputSystem에 대해 알아보자#1(기본)
일단 본 글은 공식문서를 참조하여 작성되었습니다.
유니티 버전에 따라서 InputSystem의 버전도 달라질 수 있습니다.
참고하실 때 유니티 패키지 매니저에서 Input System의 버전을 확인하시고
해당 버전에 맞는 문서를 체크하시면 좋을 것 같습니다.
저는 현재 유니티 2022 LTS로 작업을 해서 1.7 기준으로 글을 작성하고 있습니다.
무턱대고 공식문서의 가장 최신버전으로 해봤다가 시간 날리는 일이 없으셨으면 합니다.
공식문서 링크는 맨 아래 추가해 놓았습니다.
공식문서에선 Input System 버전 설명이 1.11까지 있던데
글 작성 시점 가장 최근에 나온 유니티6 버전은 1.8을 사용하더군요.
뭔가 되게 보수적인 것 같이 느껴져서 신기했달까.
아무튼 공식문서 Introduction - workflows에선
버전 별 4가지에서 3가지의 사용법을 소개하고 있습니다.
이전 블로그 글 내용에서 1가지(PlayerInput Component 방법)를 소개했으니
오늘은 남은 3가지 방법(1.7 기준)에 대해 자세하게 알아볼까 합니다.
Direct 방식
인풋 시스템에서도 Input Manager 방식(이전 인풋 시스템)처럼
사용할 수 있는 방법이 있었습니다 . ㄷㄷ
개인적으론 간단하고 빠르게 작업해야 하는 경우 편리하게 사용할 것 같습니다.
예시코드는 공식 문서에서 가져온 코드입니다.
using UnityEngine;
using UnityEngine.InputSystem;

public class MyPlayerScript : MonoBehaviour
{
    void Update()
    {
        var gamepad = Gamepad.current;

        if (gamepad == null)
        {
            return; // No gamepad connected.
        }

        if (gamepad.rightTrigger.wasPressedThisFrame)
        {
            // 'Use' code here

        }

        Vector2 move = gamepad.leftStick.ReadValue();
        {
            // 'Move' code here
        }
    }
}
간단하게 추가 설명을 하자면
Keyboard keyboard; Mouse mouse;
이런 식으로 원하는 기기 방식을 직접 불러와 사용이 가능합니다.
keyboard = Keyboard.current;
직접 불러 올 경우 기기에 맞게 초기화 과정을 거쳐야 합니다.
예시 코드에선 gamepad를 가져와서 사용하는 모습이었습니다.
Migration from old input system이라는 공식문서 파트를 보니
GetButton이 InputSystem에선 IsPressed로,
GetButtonDown이 WasPressedThisFrame으로 ,
GetButtonUp이 WasReleasedThisFrame으로
변환되어 사용되고 있다는 걸 알게 되었습니다.
Button은 대문자인데 mouse와 Key부분은 isPressed 이런 식으로, 소문자로 처리하네요.
이 점 유의하시면 좋을 거 같습니다.
여기에 조금 더 부연 설명하자면
wasPressedThisFrame은 최초로 눌렀을 때 순간을 true, false로 반환
isPressed는 누르고 있다면 계속 true 반환
wasReleasedThisFrame은 키를 땔 때 true,false 반환
한다고 합니다.
Embedded Action 방식
using UnityEngine;
using UnityEngine.InputSystem;

// Using embedded actions with callbacks or reading values each frame.

public class ExampleScript : MonoBehaviour
{
    // these embedded actions are configurable in the inspector:
    public InputAction moveAction;
    public InputAction jumpAction;

    public void Awake()
    {
        // assign a callback for the "jump" action.
        jumpAction.performed += ctx => { OnJump(ctx); };
    }

    public void Update()
    {
        // read the value for the "move" action each frame.
        Vector2 moveAmount = moveAction.ReadValue<Vector2>();
    }

    public void OnJump(InputAction.CallbackContext context)
    {
        // jump code goes here.
    }

    // the actions must be enabled and disabled
    // when the GameObject is enabled or disabled

    public void OnEnable()
    {
        moveAction.Enable();
        jumpAction.Enable();
    }

    public void OnDisable()
    {
        moveAction.Disable();
        jumpAction.Disable();
    }
}
InputAction이 담긴 스크립트를 통해 동작을 제어하는 방식입니다.
코드만 보면 이해가 안 가실 수도 있을 것 같아서
실제 어떻게 동작하는지 아래 유니티 화면을 캡처해 왔습니다.
다음은 유니티에서 Add Component를 통해 스크립트를 추가한 모습입니다 .
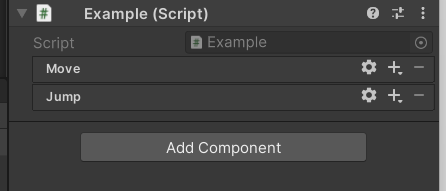
예시코드와 같습니다만 이름만 moveAction 대신 move와 jump로 바꿨습니다.
해당하는 부분에 직접 원하는 입력값을 설정하고 관리하는 방식이었습니다.
기본적으로 인풋 시스템은 대리자 기반의 이벤트 시스템으로 구현되어 있습니다.
코드를 자세히 보시면 +=를 통해 OnJump 메서드를 등록하고 있는 걸 확인하실 수 있습니다.
이러한 방식을 디자인 패턴 기법 중 상태패턴이라고 합니다.
디자인 패턴 내용은 조만간 정리해 링크를 걸겠습니다.
Component에 존재하기에, 해당 오브젝트의 활성화 비활성화 유무에 따라
OnEnable과 OnDisable을 사용하여 처리하는 모습입니다 .
Action Asset 방식
using UnityEngine;
using UnityEngine.InputSystem;

public class Example : MonoBehaviour
{
    InputActionAsset actions;

    // These variables are to hold the Action references
    InputAction moveAction;
    InputAction jumpAction;


    private void Start()
    {
        // Find the references to the "Move" and "Jump" actions

        // find the "move" action, and keep the reference to it, for use in Update
        moveAction = actions.FindActionMap("gameplay").FindAction("move");

        // for the "jump" action, we add a callback method for when it is performed
        actions.FindActionMap("gameplay").FindAction("jump").performed += OnJump;


        // 1.8버전에서는 바로 찾는 게 가능합니다.
        // moveAction = InputSystem.actions.FindAction("Move");
        // jumpAction = InputSystem.actions.FindAction("Jump");

    }

    void Update()
    {
        // Read the "Move" action value, which is a 2D vector
        // and the "Jump" action state, which is a boolean value

        Vector2 moveValue = moveAction.ReadValue<Vector2>();
        // your movement code here


    }


    private void OnJump(InputAction.CallbackContext context)
    {
        // this is the "jump" action callback method
        Debug.Log("Jump!");
    }

    void OnEnable()
    {
        actions.FindActionMap("gameplay").Enable();
    }
    void OnDisable()
    {
        actions.FindActionMap("gameplay").Disable();
    }

}
Embeded 방식과 유사해 보입니다만
여기서는 InputActionAsset에 직접 접근하여 동작하고 있습니다.

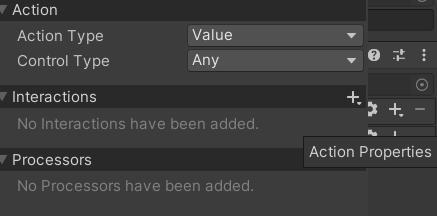
이전 글에서 이렇게 생겼던 걸 보여드린 게 기억나시나요?
InputActionAsset 이라는게 저겁니다.
다만 이걸 코드로 사용한 과정입니다.
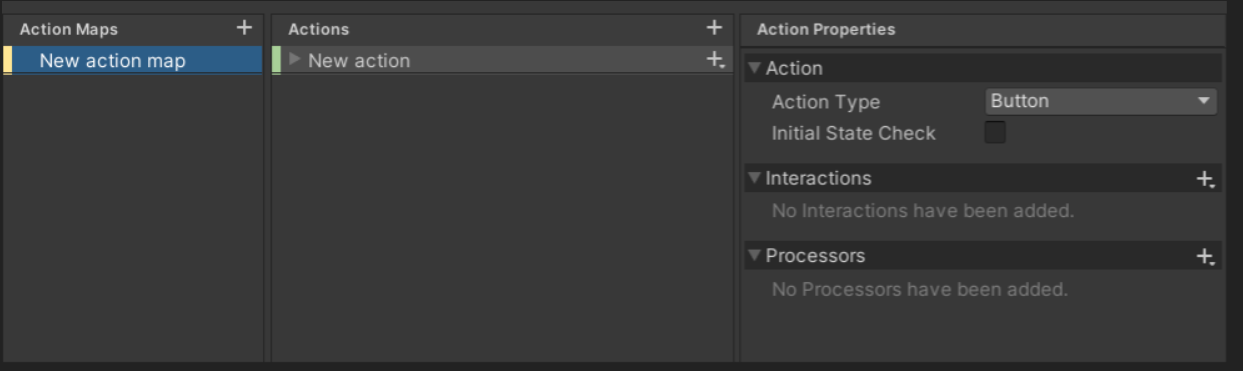
이 내용에 하나하나 직접 접근하고 있는 걸 설명하고 있는 겁니다.
ActionMaps에 등록된 "gamePlay"를 찾아서
그 아래 Actions 중 "jump" 혹은 "move"를 실행하는 과정의 코드였습니다.
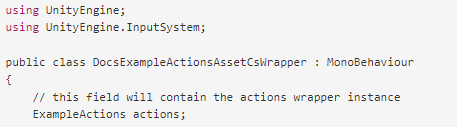
원하는 InputActionAsset을 선택 후
Generate c# class 생성하여 활용하는 방법도 있습니다.
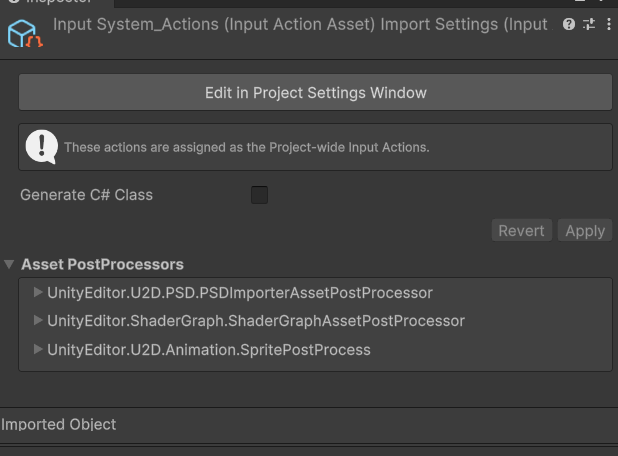
체크 버튼을 누르면 InputActionAsset을 클래스로 만들 수 있고
이를 다른 클래스에서 불러와서 처리가 가능합니다.
오늘은 이렇게 InputSystem을 자세하게 알아보았습니다.
분량 조절 실패로 InputSystem을 응용하여 UI를 컨트롤 하는 내용은
따로 작성하고 추가해 보도록 하겠습니다.
참고한(혹은 참고하면 좋을) 내용
https://docs.unity3d.com/Packages/com.unity.inputsystem@1.7/manual/index.html
Input System | Input System | 1.7.0
Input System The Input System allows your users to control your game or app using a device, touch, or gestures. Introduction Unity supports input through two separate systems, one older, and one newer. The older system, which is built-in to the editor, is
docs.unity3d.com
'유니티 > 공통' 카테고리의 다른 글
| 유니티 - 특정 스크립트가 적용되어 있는 오브젝트 찾는 법 (0) | 2024.10.21 |
|---|---|
| 유니티 - Resources를 활용해 에셋을 로드해보자 (1) | 2024.10.18 |
| 유니티 - InputSystem에 대해 알아보자#1(기본) (0) | 2024.10.15 |
| 유니티 - JSON을 이용하여 데이터를 저장해보자. #2 응용 - 구글 스프레드 시트 활용 (feat. 구글 앱스 스크립트) (2) | 2024.10.05 |
| 유니티 - JSON을 이용하여 데이터를 저장해보자. #1 저장과 암호화 (0) | 2024.10.01 |